Shoulder Workout at Home: No-Equipment Routine

You don’t need a cable machine or a rack of dumbbells to build shoulders that look good in a t-shirt and hold up at a desk all day. You need a floor, a wall, and something with a bit of weight to it. The shoulders respond well to home training because the muscle that gives them their rounded shape, the deltoid, sits right on the surface and fires up under fairly light loads. What most home routines miss is the back of the shoulder. It does most of the work for your posture, and it gets skipped almost every time.
This guide fixes that. It’s part of our home-workout series, alongside the arm workout at home and the chest workout at home.
The short answer
Train your shoulders with pike push-ups for the front and side, then add lateral, front, and rear raises using two filled water bottles or a loaded backpack. Do it twice a week. That covers all three heads of the deltoid plus the rear delts that keep your shoulders from rolling forward.
If you own dumbbells, use them for the raises. If you don’t, a 1.5-liter water bottle weighs about 1.5 kg and a backpack loaded with books gets you to 5 to 10 kg easily. The side and rear delts are small muscles that respond to light weight and clean form, so improvised load works far better here than it does for legs or back.
The rest of this is one way to put that together.
What you’re actually training
The deltoid is one muscle with three separate sections, and they don’t all do the same job. Treating “shoulders” as one thing is why so many home routines leave the back of the shoulder underdeveloped.
- Anterior (front) delt. Lifts your arm forward and presses overhead. It already gets plenty of work from push-ups and any pressing you do, so it’s usually the most developed of the three.
- Medial (side) delt. Lifts your arm out to the side. This is the head that gives shoulders their width and that capped look. Lateral raises are its main driver.
- Posterior (rear) delt. Pulls your arm backward and rotates it outward. It’s the most neglected head by a wide margin, and it’s the one that matters for posture.
Sitting at a desk for hours pulls your shoulders forward. When the muscles between your shoulder blades weaken, the chest tightens and tilts the shoulder blades forward and down, which deepens that rounded, hunched look (NASM). Strong rear delts and upper-back muscles pull in the opposite direction. If you spend your day at a keyboard, the rear-delt raises below are the ones to take seriously.
There’s also a deeper layer worth knowing about: the rotator cuff, four small muscles that hold the head of your upper-arm bone centered in the shoulder socket. They don’t make your shoulders look bigger. They keep the joint stable so the bigger muscles can do their job without the joint grinding (NASM). When people get nagging shoulder pain from pressing, weak or imbalanced cuff muscles are often part of the story. The good news is that controlled raises and pulls train the cuff indirectly, and the form cues below protect it.
Pike push-ups: your main pressing move
The pike push-up is the closest thing bodyweight training has to an overhead press. It loads the front and side delts hard, no equipment required.
How to do it
- Start in a push-up position, then walk your feet in and push your hips up so your body makes an upside-down V. Your head should point toward the floor, hips high.
- Keep your back flat. The straighter the line from hands to hips, the more the weight sits over your shoulders instead of your chest.
- Bend your elbows and lower the top of your head toward the floor between your hands. Aim for a triangle: hands and the point your head touches.
- Stop just before your head hits the ground, then press back up to the start.
Do 3 sets of 8 to 12 reps. Rest 60 to 90 seconds between sets.
The higher your hips, the more vertical the press, and the more it targets your shoulders rather than your chest. If standard pike push-ups feel easy, that vertical angle is your dial to turn.
Making it harder: the wall-handstand progression
Once bodyweight pike push-ups stop challenging you, raise the angle:
- Feet elevated. Put your feet on a low step or couch so your torso tips closer to vertical. More of your weight loads the shoulders.
- Wall walk. Face away from a wall, get into a pike with your feet on the wall, and walk your hands closer to the base. The closer your hands, the more vertical you get.
- Wall handstand hold. Kick up to a handstand against the wall and just hold it, building the shoulder strength and stability you’ll need before you try handstand push-ups. Start with 10- to 20-second holds.
This progression matters because bodyweight gets easy fast, and a muscle that isn’t challenged stops adapting. The handstand line gives you years of room to grow without buying a thing.
Raises: where water bottles and a backpack come in
Pressing builds the front of the shoulder, but the side and rear heads need direct raise work, and that’s where you add light load. Two water bottles or a backpack are plenty.
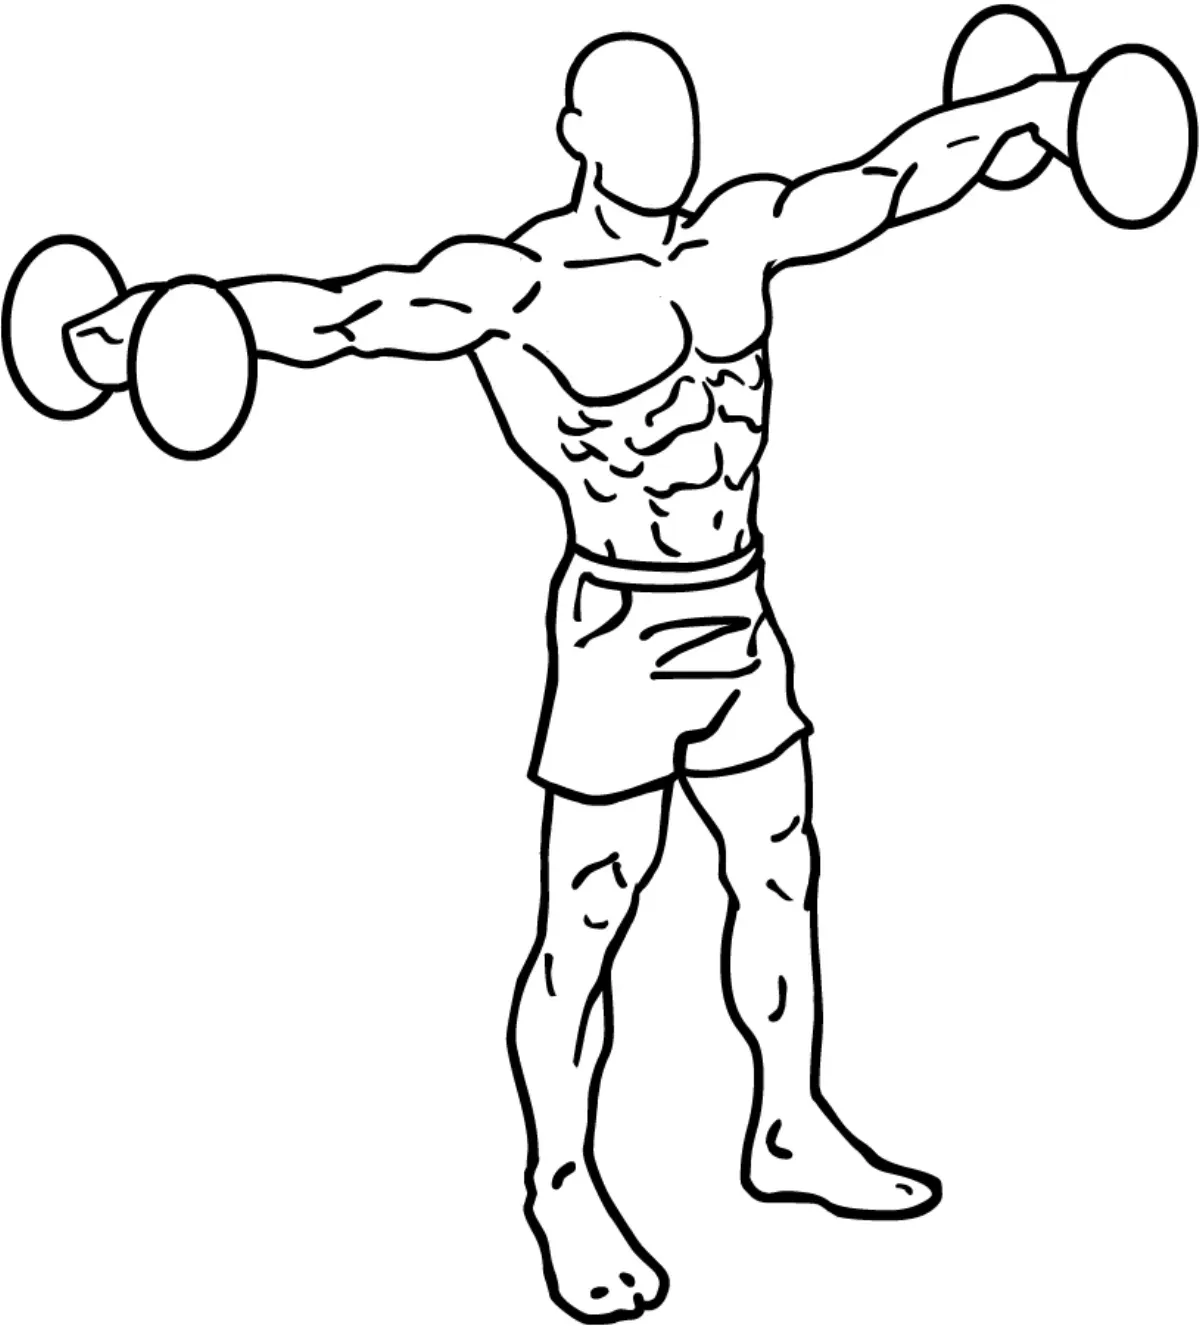 Illustration by Everkinetic via Wikimedia Commons (CC BY-SA 3.0)
Lateral raises (side delts)
Hold a water bottle in each hand at your sides, palms facing in. Keep a soft bend in your elbows. Lift both arms out to the sides until they’re roughly level with your shoulders, then lower slowly under control. Do 3 sets of 12 to 15.
The lateral raise is the single best move for the side delt. In one EMG study of trained lifters, the lateral raise produced the highest medial-deltoid activation of the exercises tested, around 30% of maximum voluntary contraction, well above pressing variations (Campos et al., 2020, Journal of Human Kinetics). Go light. This is a precision move, not a heave.
Front raises (front delts)
Hold your bottles in front of your thighs, palms facing your body. Lift one or both straight out in front until they reach shoulder height, then lower. Do 2 sets of 12.
Your front delts already get hammered by pike push-ups and any pressing, so keep front-raise volume modest. Two sets is enough for most people. Overloading the front and ignoring the rear is exactly the imbalance that pulls shoulders forward.
Rear raises and reverse fly (rear delts)
Skip everything else before you skip this. Two reliable ways to hit it at home:
Bent-over rear raise. Hinge at the hips until your torso is close to parallel with the floor, bottles hanging down. Keep a slight elbow bend and raise both arms out to the sides, squeezing your shoulder blades together at the top. Lower slowly. Do 3 sets of 12 to 15.
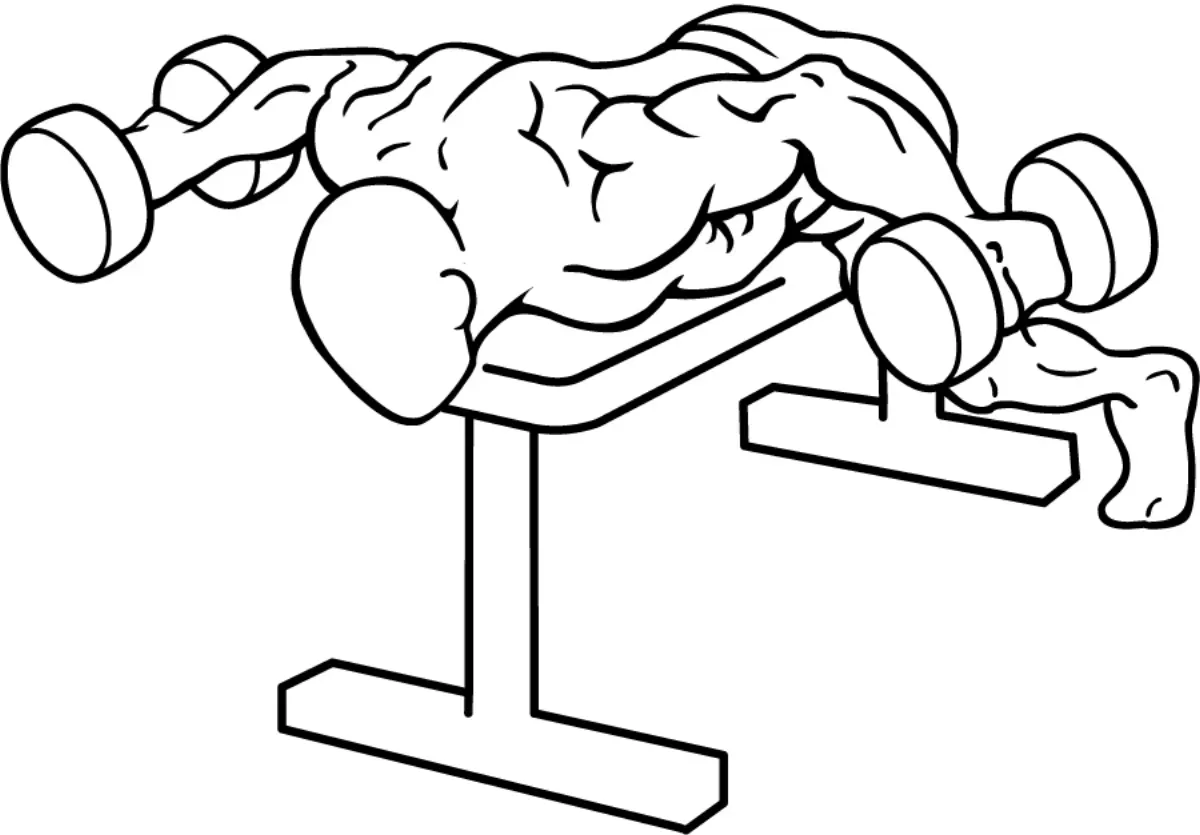 Illustration by Everkinetic via Wikimedia Commons (CC BY-SA 3.0)
Lying rear raise. Lie face-down on a bed or bench with your arms hanging toward the floor, a bottle in each hand. Raise them out to the sides until level with your shoulders, then lower. The face-down position takes momentum out of the move and makes the rear delt do the work, which is why it’s such a clean home option.
The same EMG study found the lateral raise also lit up the posterior delt strongly (around 24% MVIC), so a slight forward lean during your side raises gives the rear delt a bit of extra work too (Campos et al., 2020). For desk workers, this is the exercise that earns its keep. Strong rear delts pull your shoulders back where they belong, and over time you’ll notice you sit taller without thinking about it.
A weekly plan
Twice a week is the target. The WHO recommends muscle-strengthening activity on at least two days a week for adults, and the deltoids recover quickly enough that two sessions, 48 hours apart, work well (WHO).
Day 1 (press-led)
- Pike push-ups: 3 x 8-12
- Lateral raises: 3 x 12-15
- Bent-over rear raises: 3 x 12-15
- Front raises: 2 x 12
Day 2 (raise-led, lighter)
- Wall handstand hold or feet-elevated pike: 3 x 20-40 sec / 8-10
- Lateral raises: 3 x 15
- Lying rear raises: 3 x 15
The whole thing takes about 20 minutes. If you only have time for one move on a busy day, do lateral raises, because the side delt is what most home trainees are missing for shape. If you only have energy for one for your posture, do the rear raise.
This pairs well with the rest of your week. Slot it next to an ab workout at home or a booty workout at home and you’ve got a full bodyweight-friendly split that needs almost no gear.
Common mistakes
Most stalled shoulder progress at home comes down to four errors.
- Shrugging the weight into your traps. If your shoulders ride up toward your ears on raises, your upper traps are stealing the work from your side delts. Pull your shoulders down and back, lock them there, and lift only with the delt. This usually means using less weight than your ego wants.
- Going too heavy and losing form. The side and rear delts are small. Swinging a heavy backpack up with body english trains momentum, not muscle. A lighter load you can lift slowly and lower under control beats a heavy one you throw. Control the lowering phase especially.
- Neglecting the rear delts. Most people press and do front raises and call it shoulders. That builds the imbalance that rounds your posture forward. Give the rear delts equal or greater volume than the front, particularly if you sit a lot.
- Pushing through shoulder pain. Pressing overhead with a poorly stabilized joint is a common route to shoulder impingement, where soft tissue gets pinched at the top of the movement. Sharp pain, pinching, or a painful arc when you lift your arm is a signal to stop, not to grind through. Back off the pressing, keep the controlled raises that strengthen the supporting muscles, and if pain persists, see a physio. Building strong, balanced shoulders is a slow project, and one angry joint can cost you months.
Keep the habit going
Three twenty-minute shoulder sessions look like nothing on paper. The hard part isn’t the workout, it’s coming back to it next week, and the week after, when nothing visible has changed yet. Shoulders are a patient muscle. The width and the posture show up over months, not days, and that gap between effort and reward is where most home routines quietly die.
A small companion helps close that gap. TrainWiz is a home-workout app built around a buddy that grows every time you work out, free with a premium tier, on iOS and Android. A 20-minute shoulder session counts, feeds your streak, and gives the impatient part of your brain a small reward today while the real results are still weeks out.
It won’t lift the water bottles for you. It just gives you a reason to show up on the days you’d rather not, which over a few months is the entire difference between strong, balanced shoulders and another abandoned plan. If the showing-up is your weak point, our guide on how to motivate yourself to work out goes deeper, and a small companion that grows alongside your training is one honest way to make the next session happen.
Frequently asked
- Can you really build shoulders at home with no equipment?
- Yes, for the front and side delts especially. Pike push-ups load the anterior and medial delts with your own bodyweight, and as you get stronger you raise your hips, elevate your feet, or progress toward a wall handstand to keep adding resistance. Filled water bottles or a loaded backpack cover the lateral, front, and rear raises that bodyweight alone can't reach well.
- How often should I train shoulders at home?
- Two sessions a week is the sweet spot for most people. The deltoids recover faster than bigger muscles, so 48 hours between sessions is usually enough. The WHO recommends muscle-strengthening work on at least two days a week, and two focused shoulder days fit neatly into that without overloading a small muscle group.
- Why do my traps take over instead of my shoulders during raises?
- You're probably shrugging the weight up or going too heavy. When the load is more than the side delts can lift cleanly, your upper traps jump in to help and your shoulders hike toward your ears. Drop the weight, keep your shoulders pulled down away from your ears, and lift with a slight bend in the elbow so the side delt does the work.