SI Joint Stretches for Back and Hip Pain Relief
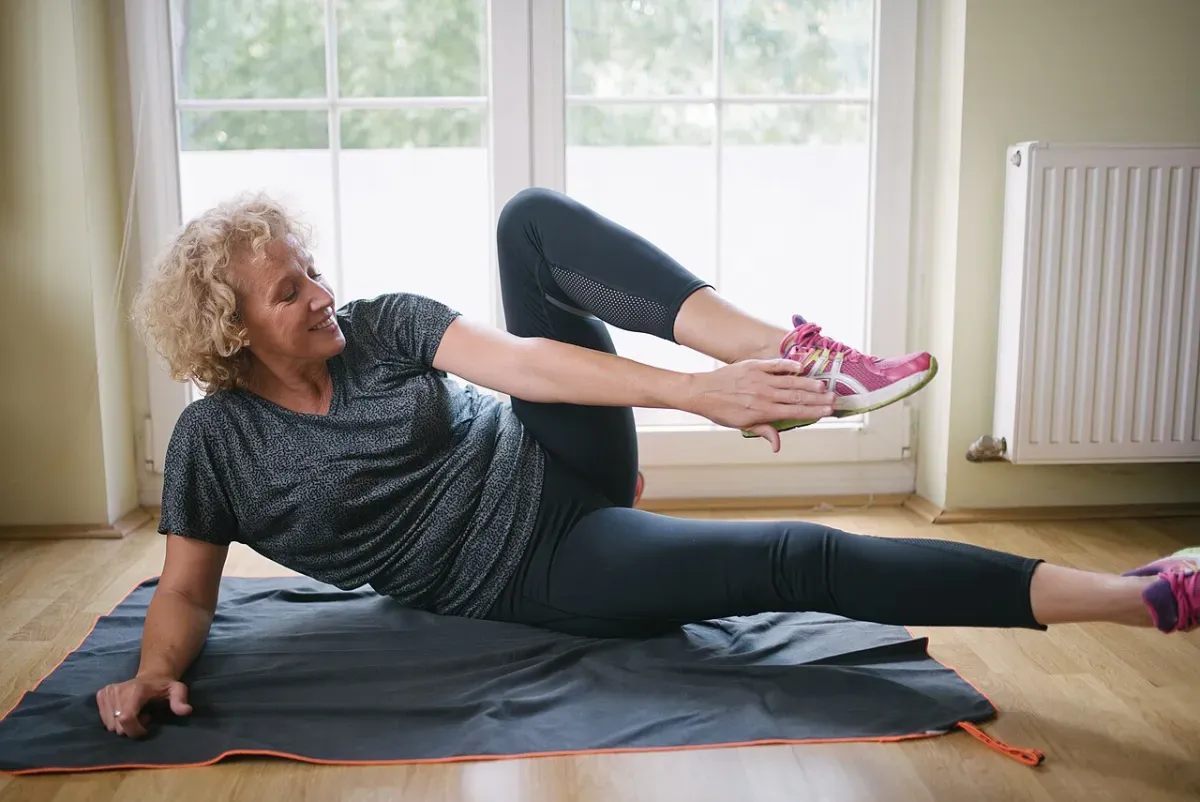
Stretching offers short-term relief for pain around a sacroiliac joint designed to barely move, but targeted strengthening is the part with more evidence behind it. You ease the immediate discomfort with gentle mobility work. You build long-term resilience by loading the muscles that protect the pelvis. When this tightly bound structure hurts, the sources that do exist point toward isometric abdominal work and pelvic control.
Pinning down the sacroiliac joint as the true source of your discomfort is genuinely difficult. Between 15 and 30 percent of low back pain is attributable to sacroiliac joint pathology, according to StatPearls, Sacroiliac Joint Injury. This means the vast majority of low back pain originates somewhere else entirely. The symptoms overlap heavily with nerve root issues and lumbar spine problems. You cannot tell from a blog post whether your pain is coming from the SI joint.
Gentle stretches and targeted stability work are low-risk interventions regardless of the exact diagnosis. You don’t need to push into painful ranges. A conservative approach prioritises light movement to calm the surrounding tissues. Once the area settles, you move quickly into loading the muscles that protect the pelvis. You can start feeling better without needing a perfect label for the ache.
The short version: stretch for relief, strengthen for stability
A sensible routine for pelvic pain uses stretching as a warm-up and strengthening as the main event. You use mobility work to create a window of comfort. You then use strength work to teach your body how to control that newly comfortable space.
What ten minutes of stretching can and cannot do
Stretching the muscles around the pelvis can relieve the tight, guarding sensation that accompanies back pain. When you are hurting, your nervous system often commands the surrounding muscles to clamp down in an attempt to protect the area. Gentle stretching signals to the body that it is safe to relax. It feels good and helps you move through your day with less friction. The evidence for specific stretches resolving SI joint dysfunction is remarkably thin.
A systematic review by Al-subahi et al. 2017, Journal of Physical Therapy Science looked at various conservative treatments for the condition. They found only nine articles that met their inclusion criteria. Of those, only three examined the effect of exercise at all. The researchers noted that the quality of the included studies ranged from low to average. They concluded that manipulation, exercise and kinesio tape were effective for pain, disability and pelvic asymmetry, while also highlighting a clear need for further research. Stretching is a tool for temporary symptom management. Do not expect it to act as a permanent cure.
Why the SI joint responds to load
The sacroiliac joint requires compression and control. It relies on a massive network of ligaments and overlying muscles to keep it stable while transferring the entire weight of your upper body into your legs. When the joint becomes painful, the solution is usually to improve that active muscular compression.
According to StatPearls, Sacroiliac Joint Injury, isometric abdominal strengthening is described as the primary method of protecting the SI joint. Stabilization training has been shown to reduce disability by 50 percent in the long term. Nothing comparable is claimed for stretching alone. By loading the core and the glutes, you give the joint the rigid support it needs to function properly.
Where the SI joint is and why it hurts
Understanding the mechanics of the pelvis helps explain why the pain behaves the way it does. The architecture here is built for immense load-bearing capacity.
One joint on each side of the sacrum
The sacrum is the triangular bone at the base of your spine. The ilium is the large, wing-shaped bone of your pelvis. The sacroiliac joint is the junction where these two bones meet. You have one on the left and one on the right. If the ache is spread across your whole lower back, you may want to start with general lower back stretches.
A joint built to barely move
Unlike your shoulder or your hip, which allow for massive sweeping arcs of motion, the SI joint is designed to be rigid. It allows only minimal movement. Risk factors for developing pain here include female sex, prior lumbar fusion, obesity, occupational overuse, and athletic overuse, as detailed by StatPearls, Sacroiliac Joint Injury. Pregnancy is one risk factor among five. During pregnancy, relaxin-mediated ligamentous laxity increases the mobility of the pelvic joints, allowing them to shift more than usual.
The pain pattern in the buttock and posterior thigh
Patients frequently indicate the area between the gluteal folds and the posterior iliac crests as the primary site of discomfort. The pain commonly refers down into the leg. The posterior thigh is the most common referred site, reported in 50 percent of patients according to StatPearls, Sacroiliac Joint Injury. Typical aggravators include stair climbing, sitting cross-legged, and prolonged sitting or standing.
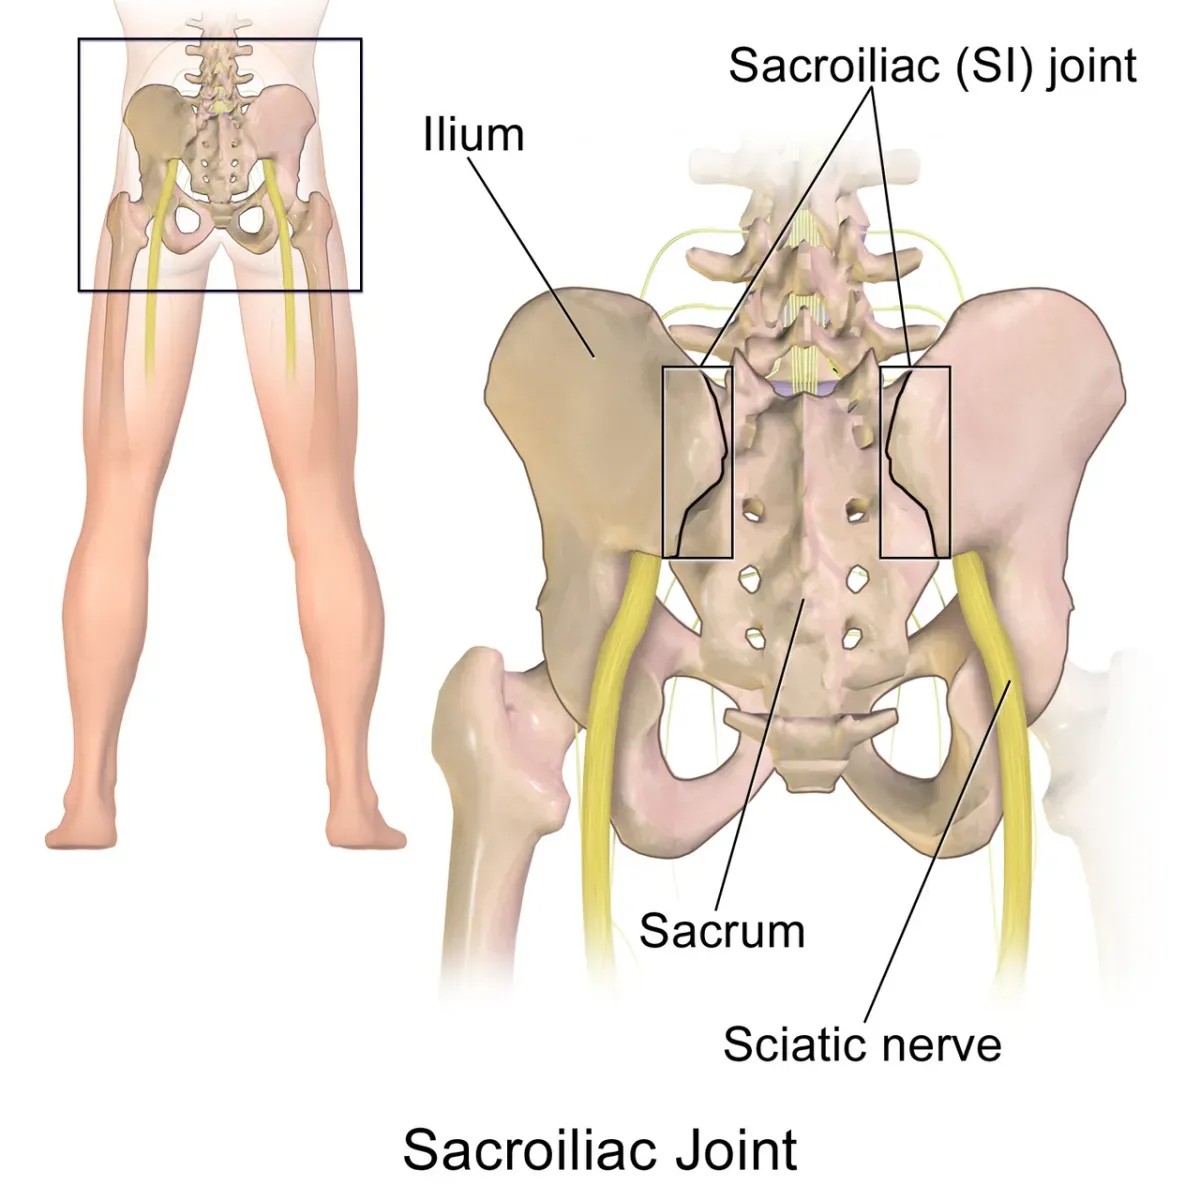 credit: Illustration by BruceBlaus via Wikimedia Commons (CC BY 3.0)
SI joint, sciatica, or ordinary low back pain?
The reason clinicians hesitate to definitively diagnose SI joint pain on a first visit is that it looks almost identical to several other common spinal issues. Self-diagnosis is entirely unreliable.
The overlap is real, and clinicians struggle with it too
The presentation of SI joint injury overlaps heavily with S1 radiculopathy, which classically manifests as sciatica. It also mimics lumbosacral facet syndrome, disc herniation, and proximal L5 nerve pathology. As noted by Buchanan et al. 2021, Successful Diagnosis of Sacroiliac Joint Dysfunction, these overlapping symptoms mean that sacroiliac joint pain is exceptionally difficult to isolate on a first assessment.
What leans toward the SI joint
Because the symptoms are so muddy, doctors rely on physical examination tests that deliberately try to provoke the pain. No single physical exam manoeuvre is diagnostic. When three or more provocation tests yield positive findings, sensitivity and specificity reach 91 and 78 percent respectively, according to StatPearls, Sacroiliac Joint Injury. A clinician must identify three or more positive physical tests before they can confidently point to the SI joint.
What leans toward a nerve, and why imaging often falls short
If the pain travels below the knee with pins and needles, numbness, or a feeling of electrical burning, the picture leans toward a nerve root issue. In that case, sciatica stretches are often the better starting point.
You might expect an X-ray or an MRI to clear up the confusion. The SI joint is notoriously difficult to profile on radiographs. Clear evidence of structural lesions may or may not be identifiable. You can have severe pain with a perfectly clean scan.
Five gentle stretches and one isometric hold
These movements are designed to reduce muscular tension around the pelvis. They are gentle, conservative, and low-risk. Hold times should be 20 to 30 seconds per side as a conservative default. Breathe normally throughout the movement, and always work both sides even if only one side hurts.
Single knee-to-chest
Lie flat on your back in a comfortable area. Bring one knee slowly up toward your chest, clasping your hands just below the kneecap. Pull gently until you feel a mild stretch in the lower back and glute. Keep your neck relaxed and your shoulders pinned to the floor. Hold this position calmly. Release the leg and switch sides. People frequently pull too hard, causing the opposite hip to lift off the ground. Keep the resting leg relatively flat to anchor your pelvis.
Double knee-to-chest
After stretching each leg individually, you can move into the bilateral version. Bring both knees up to your chest simultaneously. Wrap your arms around your shins and let your lower back round slightly into the floor. This provides a broad, gentle stretch across the entire lower lumbar region and the upper glutes. It’s an excellent way to relieve the feeling of stiffness that often builds up after a long day of sitting.
Supine figure-4
Lie on your back with both knees bent and your feet flat on the floor. Cross your right ankle over your left knee to create a shape like the number four. Reach your hands through the gap and clasp the back of your left thigh. Pull the left thigh gently toward your chest until you feel a stretch deep in the right buttock. This exact same shape shows up in most standard glute stretches. If reaching your thigh is too difficult, you can leave your left foot on the floor and simply press your right knee away from you.
Supine trunk rotation
Lie on your back with your knees bent and feet flat, arms resting out to your sides in a T-shape. Keeping your shoulders firmly in contact with the floor, let both knees fall slowly to the right side. Go only as far as is comfortable. You are looking for a gentle twisting sensation through the lower back and the side of the hip. Hold the position, then slowly bring the knees back to the centre and drop them to the left. Do not force your knees all the way to the ground if your lower back feels tight.
Half-kneeling hip flexor stretch
Kneel on your right knee, placing your left foot flat on the floor in front of you. Keep your torso tall and gently push your hips forward until you feel a stretch in the front of your right hip and thigh. Many people make the mistake of aggressively arching their lower back to push further forward. You should keep your core braced and move your entire pelvis as a single unit. If you sit most of the day, working through a full set of hip flexor stretches helps counter that constant shortened position.
The adductor squeeze
This bridges the gap between stretching and strengthening. It is an isometric hold. Lie on your back with your knees bent and place a firm cushion or a rolled-up towel between your knees. Squeeze your knees together into the cushion as hard as you comfortably can. Hold the squeeze for 5 to 10 seconds, then relax. Complete 10 repetitions. This fires up the inner thigh muscles and helps stabilise the front of the pelvis.
The stability work that matters more than stretching
Once you have calmed the area with stretching, you must load it. The goal is to build muscular control around the pelvis that prevents the SI joint from shifting in ways that cause pain.
Glute bridge
Lie on your back with your knees bent and your feet flat on the floor, roughly hip-width apart. Push through your heels and squeeze your glutes to lift your hips toward the ceiling. Stop when your body forms a straight line from your shoulders to your knees. Do not arch your lower back aggressively at the top. Hold the top position for a second, then lower down with control. If you feel this entirely in your hamstrings, try moving your feet slightly closer to your glutes.
Side plank
Lie on your side with your elbow positioned directly under your shoulder. Stack your feet on top of each other. Lift your hips off the floor until your body forms a straight line. Hold this position. If a full side plank is too difficult, bend your bottom knee and leave it on the floor for support. You might see people doing a straight-arm, hand-supported side plank outdoors on a concrete ledge, just like the photograph in this article. That is an advanced variation. If you are just starting out, you do not need to mimic that exact setup, and you can absolutely do this on the carpet or a rug.
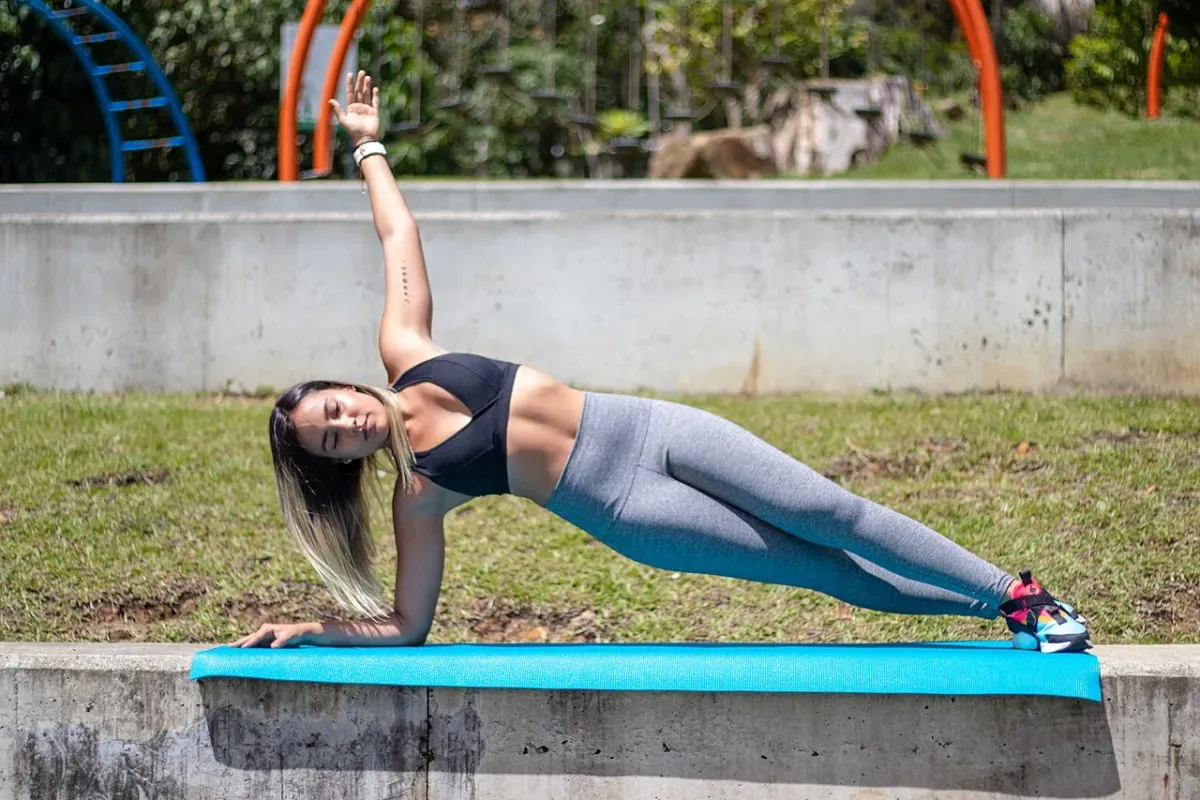 credit: Photo by Tyler Read (ptpioneer.com) on Wikimedia Commons (CC BY 2.0)
Side-lying leg raise
Lie completely flat on your side. Keeping your top leg straight, slowly lift it toward the ceiling. Keep your toes pointing straight ahead. Do not let the foot rotate upward, as that shifts the work away from the target muscles. Lower the leg slowly. This targets the lateral hip muscles, which play a major role in keeping the pelvis level when you stand on one leg.
Bird-dog
Begin on your hands and knees. Keep your back completely flat. Slowly extend your right arm forward and your left leg backward until they are parallel to the floor. Do not let your hips twist or your lower back sag. Return to the start and switch sides. Imagine balancing a glass of water on your lower back while you move. If extending both limbs is too difficult, start by just sliding one leg back at a time.
Dead bug
Lie on your back with your arms reaching straight up and your knees bent to 90 degrees, shins parallel to the ceiling. Press your lower back firmly into the floor. Slowly lower your right arm backward and your left leg forward until they hover just above the ground. Pull them back to the centre and switch sides. The entire purpose of this movement is to keep your lower back glued to the floor while your limbs move.
How to load it: sets, reps and how often
Aim for 2 to 3 sets of 8 to 12 reps for dynamic movements. Use 20 to 30 second holds for static positions like the side plank. Complete this routine 3 to 4 days a week. As you get stronger, progress by adding time to your holds or increasing the number of repetitions. Do not try to add a massive range of motion to a joint that functions best when stable.
Building the habit without flaring it up
Consistency heals, but aggressive consistency flares things up. Managing the dosage of your exercise is just as important as selecting the right movements. These are practical starting points, not tested protocols.
A 10-minute daily template
You don’t need a gruelling hour-long session. A simple, repeatable 10-minute daily template works best. The daily template uses just one round per side for the stretches. Spend the first 4 minutes working through a single round of the gentle stretches to reduce tension. Spend the next 5 minutes on the stability work, focusing on the glute bridge, dead bug, and side plank. Finish with 1 minute of walking around the room to integrate that new stability into a normal, upright movement pattern. If you want to do the full 2 to 3 rounds of stretches, save that for a dedicated standalone session.
The 24-hour rule for judging a session
Pay close attention to how your body feels the morning after your routine. This is the 24-hour rule. If the pain is the same or better the next morning, the dose was right. If the pain is clearly worse and stays worse throughout the morning, you did too much. In that scenario, reduce your range of motion and your total volume.
Common mistakes that keep the flare going
People frequently sabotage their own recovery by making a few predictable errors. Pushing forcefully into a joint that might already be too mobile is a common mistake, driven by the belief that more stretching equals more relief. Many patients also chase an audible pop, twisting their spine aggressively in hopes of realigning the pelvis. Working only the sore side is another frequent misstep, ignoring the fact that pelvic stability requires balanced strength across both sides of the body. Finally, some people drop the strength work the very week their symptoms improve. This removes the protective muscular support just as it starts working.
When to stop and get help
While conservative care works for most people, certain signs indicate that you need professional medical attention. Never push through sharp pain, numbness, or a sudden tingling sensation during a stretch. If those occur, stop immediately.
Red flags that need urgent care
According to the NHS, Back pain guidelines, call 999 or go to A and E for pain, tingling, weakness or numbness in both legs, a loss of feeling around the genitals or anus, changes in bladder or bowels such as difficulty peeing or incontinence, chest pain, or back pain that started after a serious accident.
Urgent medical advice applies if you feel hot, cold, shivery or generally unwell, or if severe pain starts suddenly or is getting worse quickly. You should see a GP for unexplained weight loss, or a lump, swelling or change in the shape of your back.
Pregnancy and the months after
Pregnancy dramatically changes the mechanics of the pelvis. The hormone relaxin increases ligamentous laxity, creating a temporary hypermobility in the pelvic joints. According to the NHS, Pelvic pain in pregnancy guidelines, physiotherapy is the recommended route. It aims to relieve or ease pain, improve muscle function, and improve pelvic joint position and stability.
Treatment may include exercises to strengthen the pelvic floor, stomach, back and hip muscles. Pregnant women are advised to avoid sitting or standing for long periods, going up and down stairs too often, lifting heavy objects, and movements that worsen pain such as moving the legs apart. If you are pregnant or recently postpartum, consult a clinician for a tailored plan.
When a physiotherapist is worth it
If you have tried conservative self-management for a few weeks and the pain remains unchanged, a physiotherapist is an excellent investment. They can guide you through the specific provocation tests and tailor a loading programme to your exact deficits. More than 75 percent of SI joint injury cases respond to conservative measures and physical therapy, as noted by StatPearls, Sacroiliac Joint Injury. You have a strong chance of resolving this with consistent effort.
Frequently asked
- How long should I hold stretches for SI joint pain?
- Hold each stretch for 20 to 30 seconds as a conservative starting point. You can do 2 to 3 rounds per side, breathing normally throughout the movement.
- Can stretching make SI joint pain worse?
- Yes, especially if you stretch too aggressively into a joint that might already be too mobile. If the pain is clearly worse the next morning, reduce your range of motion and volume.
- Is walking good for sacroiliac joint pain?
- Walking is often helpful as part of a conservative approach, but you should monitor how your body responds. Mixing a short one-minute walk into your daily stability and stretching routine helps keep you moving.