Piriformis Stretch: 5 Positions and the Angles That Matter
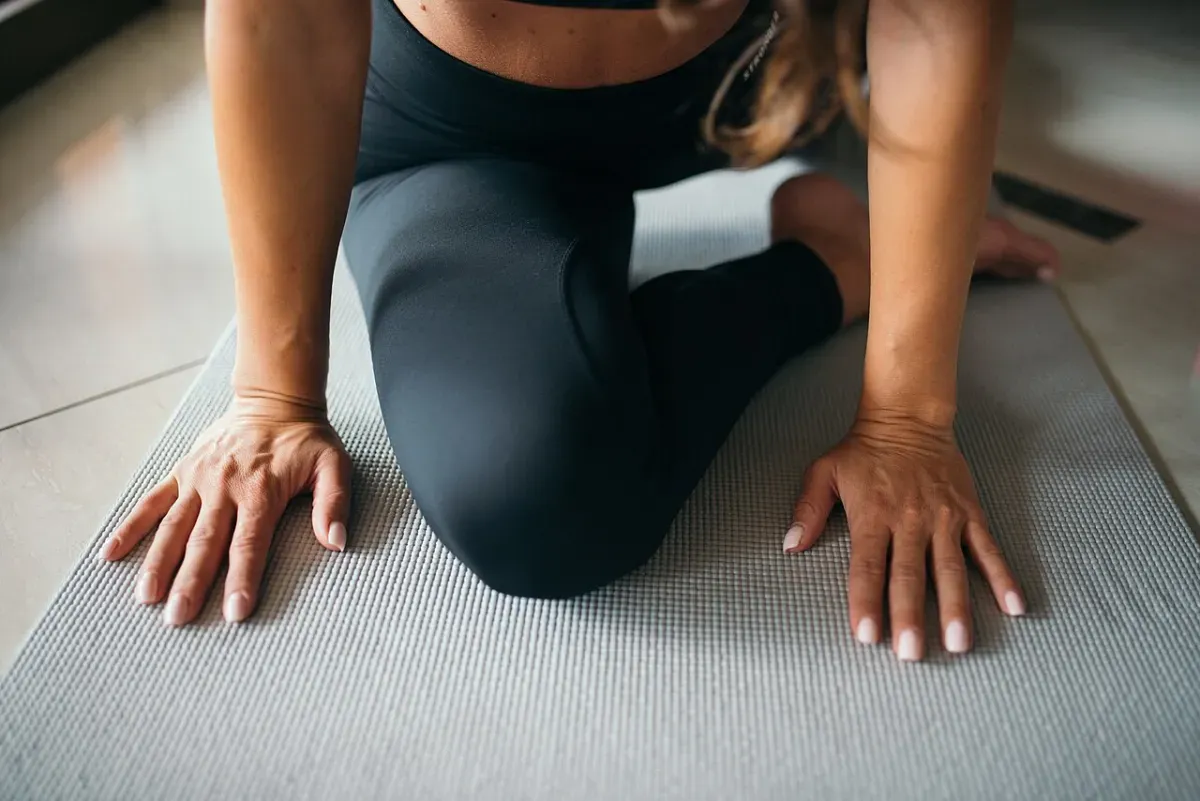
To stretch the piriformis muscle effectively, bend your hip past 90 degrees, pull your knee across your midline toward the opposite shoulder, and rotate the leg. Hold the position for 15 to 30 seconds. Repeating the movement two to four times per side, twice a day, provides a solid foundation for a symptom-management routine.
This combination of deep flexion and adduction drives the greatest change in tissue stiffness. The classic figure-4 position seen in most fitness classes often fails because it misses the cross-body pull. If you only bend the hip and drop the knee outward, you lose the adduction component, which is the variable that drove the biggest change in the lab.
We know these angles matter because researchers have measured them directly. Studies using ultrasound on living subjects and displacement tracking on cadavers both point to the same practical conclusion regarding how this area behaves under tension. You have to position the joint carefully to reach a small rotator buried beneath larger muscles. The form details determine whether the tension reaches the target or simply pulls on your lower back.
The short answer: the angle matters more than the effort
You cannot force a muscle to lengthen simply by pulling harder on your leg. Reaching one targeted rotator inside the hip joint requires precise positioning. The angle of the joint decides whether tension reaches the target at all.
What a targeted stretch is trying to reach
Your goal is to create tension across a short band of muscle that sits beneath your glutes. Because it is surrounded by much larger muscles, your position dictates success. You are trying to create a localized mechanical tension without aggravating the nerve trunk that runs right next to it.
The three angles that decide whether it works
Three joint angles dictate your success. First, you need hip flexion. With the hip flexed, its role shifts toward adduction. Second, you introduce adduction. This means pulling the knee across your body toward your opposite shoulder. Third, you add rotation to finalize the tension. The cross-body pull is the single most common variable missing from home stretching routines. If your stretch feels completely ineffective, the first thing worth checking is whether the knee is crossing the midline.
How long to hold and how often to repeat
Time under tension matters just as much as the joint angle. Current concepts in muscle stretching indicate that a static stretch is best held for 15 to 30 seconds. According to a review of stretching literature by Page in 2012, the greatest change in range of motion occurs between 15 and 30 seconds. No increase in muscle elongation occurs after two to four repetitions per side.
Older adults may need slightly longer holds to see the same benefits. Sixty-second holds for the hamstring have been associated with greater flexibility gains in older populations than shorter durations. That was measured on a different muscle, so treat it as a hint rather than a piriformis finding. For most people, a baseline protocol of two to four rounds of 30-second holds done twice a day is completely sufficient.
Where the piriformis sits, and its proximity to the sciatic nerve
Understanding the physical layout of your hip explains why this area causes so much trouble. The anatomy is crowded. The margins for error are small.
A rotator exposed by removing the glutes
The piriformis is a small rotator muscle. It runs from the sacrum at the base of your spine across the hip joint, attaching to the greater trochanter of your femur. This means it connects your tailbone area to the bony outside point of your hip. It lies beneath the gluteus maximus. You cannot reach it with a general surface massage or a basic glute squeeze. The image below shows the gluteus maximus cut and reflected to expose the rotator underneath.
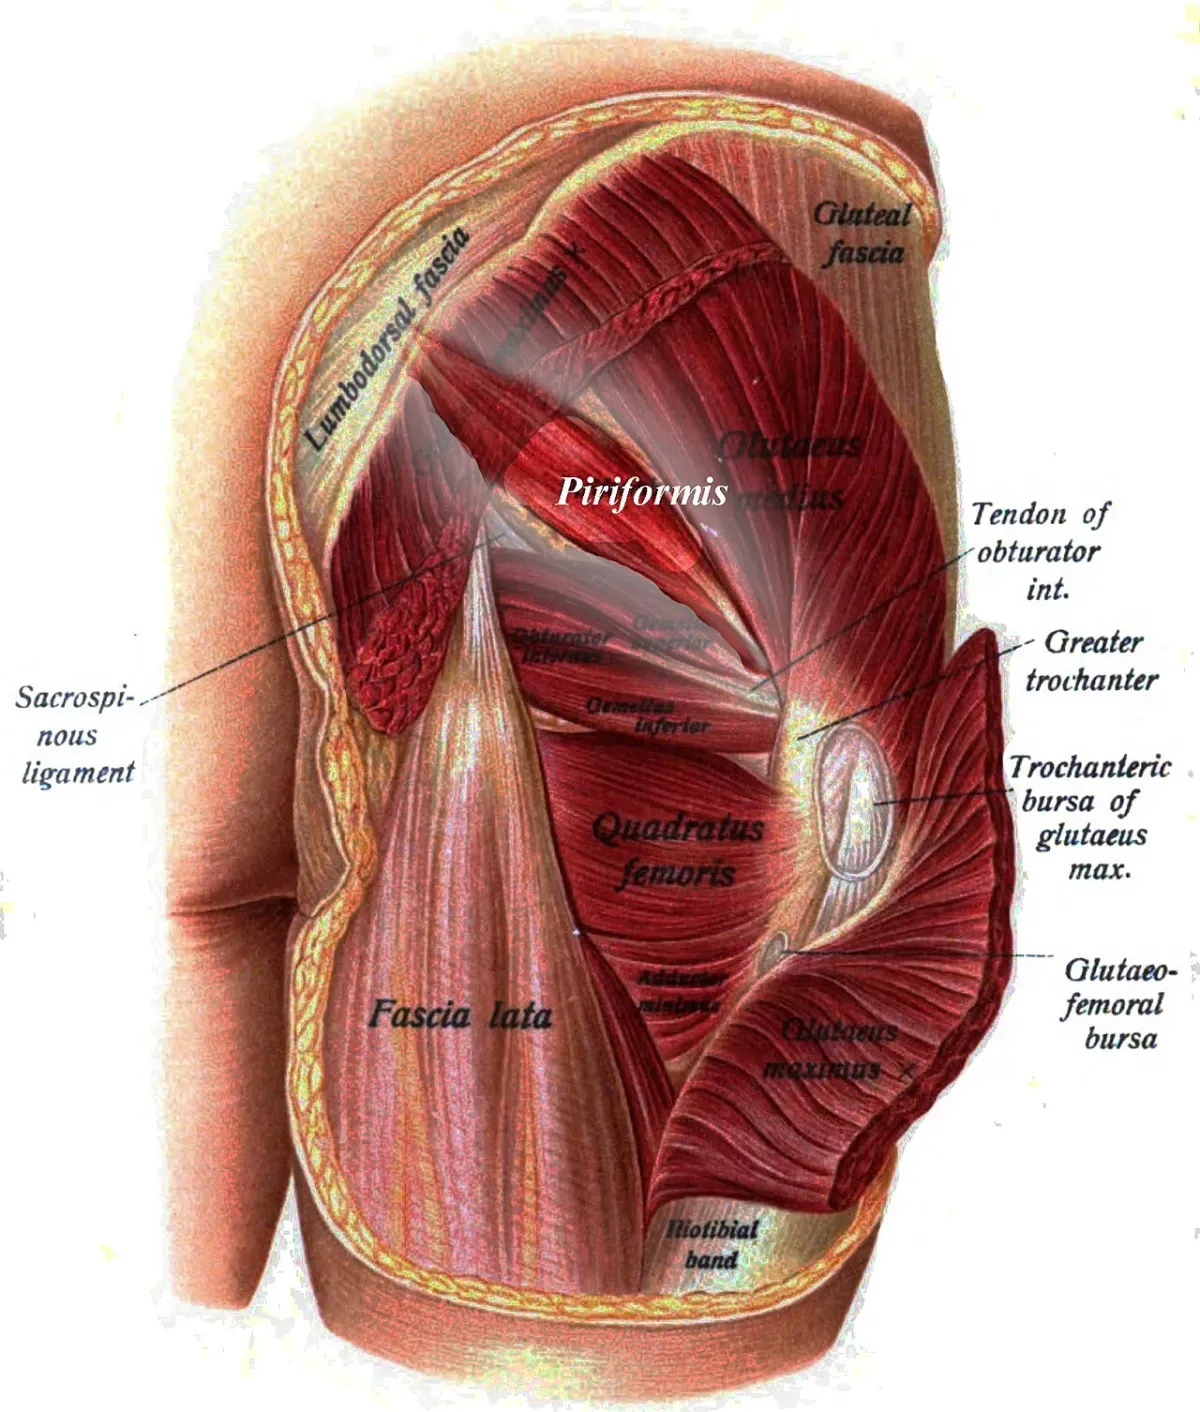 credit: Illustration by Johannes Sobotta via Wikimedia Commons (Public domain)
The sciatic nerve runs right past it
The location of this muscle would be trivial if it were not for its immediate neighbor. In more than 80 percent of people, the sciatic nerve passes deep to the piriformis and exits directly below it. This anatomical reality, detailed in the StatPearls overview of Piriformis Syndrome, is the primary reason an irritated or spasming piriformis can produce symptoms down the leg.
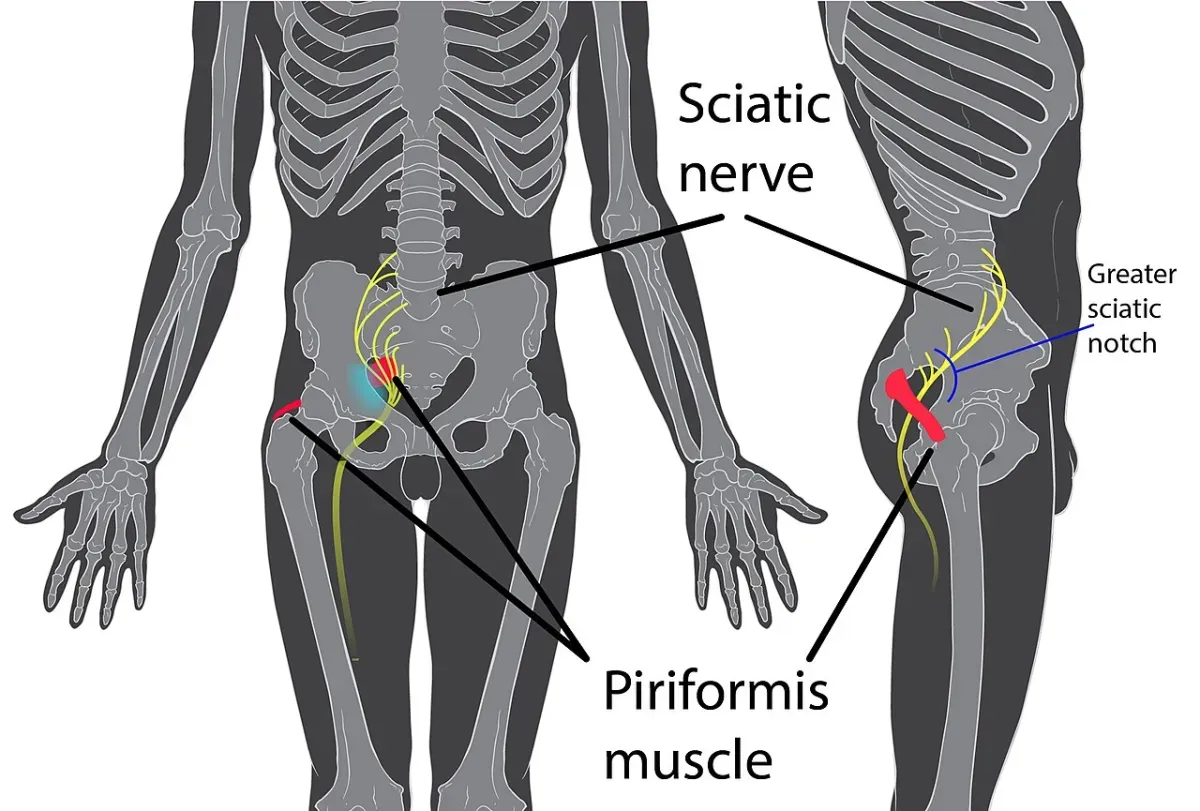 credit: Illustration by Patrick J. Lynch and KDS4444 via Wikimedia Commons (CC BY-SA 2.5)
Why the muscle’s job changes as the hip bends
The piriformis has a highly unusual trait. Its primary function changes depending on the position of your leg. When your hip is extended and your leg is straight, it works mainly as an external rotator, turning your foot outward. However, with the hip flexed, its role shifts toward adduction. This mechanical shift is exactly why your stretch position matters so much. You have to place the joint in flexion to change the muscle’s role before you can effectively lengthen it.
Five stretch positions, gentlest to deepest
You do not need to perform all of these variations. They represent a progression. Each step adds either deeper flexion or heavier adduction. Start with the gentlest option. Only move down the list if you cannot feel a stretch in your hip.
Supine figure-4: the baseline everyone starts with
The traditional figure-4 stretch happens on your back. Bend both knees and place your feet flat on the floor. Cross your right ankle over your left knee, creating a shape like the number four. Reach through the gap to grab your left thigh and pull it toward your chest. At the same time, consciously pull the entire structure slightly across your midline to add adduction.
The setup is simple. The cue that makes it work is keeping your tailbone heavy on the floor as you pull. It should feel like a mild, broad ache in the right buttock. The most common way this goes wrong is that the stretch is simply too shallow to load the muscle. Many people feel nothing at all if they forget the cross-body pull.
Figure-4 with the knee drawn across the body
To fix the shallow nature of the baseline stretch, emphasize the cross-body pull directly. Lie on your back with your legs extended flat on the floor. Draw your right knee up toward your chest. Instead of letting the knee fall outward, use your left hand to pull your right knee across your midline toward your left shoulder.
This single adjustment introduces heavy adduction. You should feel the stretch move closer to the center of the glute. The main mistake here is letting your entire pelvis roll off the floor to follow the knee. If your right hip bone lifts into the air, you are twisting your lower back instead of stretching your hip. Keep your pelvis anchored securely to the mat.
Knee-to-opposite-shoulder: the deepest supine version
This takes the previous concept to its maximum end range. Lying flat on your back, pull your right knee up past a 90-degree angle. Grasp your right shin or the back of your right thigh with both hands. Pull the knee firmly across your chest directly toward the point of your left shoulder.
This variation maxes out both hip flexion and adduction. Pull from the shin or the back of the thigh so the load goes into the hip, not the knee. Pulling on the knee joint itself can torque the knee unnecessarily. If you find your whole hip complex is tight, you may want to pair this with broader glute stretches so the surrounding tissues share the load.
Seated ankle-over-knee: the desk-break version
You can achieve a similar mechanical load while sitting in a chair. Sit on the edge of a firm seat with your feet flat on the ground. Cross your right ankle over your left knee. Keeping your spine completely straight, hinge forward at the hips.
The essential cue is to lead with your chest. Refuse to let your lower back round. A rounded spine ruins the geometry of the stretch. Tension should build immediately in the right hip. The most common mistake is collapsing the chest downward to fake depth, which takes the tension entirely off the hip and places it on the lumbar spine.
Seated floor twist: adding a torso turn
Sit on the floor with your legs straight out in front of you. Bend your right knee and step your right foot over your left leg, placing the foot flat on the floor outside your left knee. Sit tall. Wrap your left arm around your right knee and hug it tightly to your chest while gently twisting your torso to the right.
This position uses your arm to enforce deep flexion and adduction simultaneously. You should feel a stretch wrapping around the outside of the right hip. The mistake to avoid is slouching backward. Sit directly on your sit bones to maintain the relative angle between your pelvis and your femur. If this spinal rotation aggravates any existing back symptoms, abandon it immediately and return to the supine options.
Testing joint mechanics in living subjects
The advice to flex the hip and pull across the body is well documented in clinical literature. Two separate methods of investigating joint mechanics have pointed to the same practical conclusion regarding how this muscle lengthens.
Ultrasound stiffness measurements
A recent study measured muscle stiffness in living participants using shear wave elastography. Published in 2024 by Itsuda and colleagues, the researchers tested 12 different hip positions on 21 healthy young men.
They found that the piriformis was stretched most effectively at a combination of 110 degrees of hip flexion, 40 degrees of hip adduction, and maximum external rotation. This combination produced significantly more stretch than the other 11 positions tested. Measured stiffness rose in a clear order as adduction increased. A 40-degree adduction beat a 20-degree adduction, which beat zero degrees. External rotation also proved more effective than internal rotation. Adduction is clearly the variable most home routines ignore, yet it drives the greatest tension in the lab.
Cadaver work points the same way
A different method of testing reached the same practical conclusion. In a 2017 cadaveric study by McGovern and colleagues, researchers measured the displacement of strings anchored to the anatomical attachment points of the piriformis. They tested 17 hip joints from nine embalmed cadavers.
They found that the greatest piriformis lengthening occurred at 30 degrees of adduction from a starting position of 90 degrees of hip and knee flexion. Even though the measurement tool was entirely different from the ultrasound used in living subjects, the mechanical reality held true. You must flex the hip, and you must pull the leg inward.
Turning lab angles into a home routine
You cannot realistically measure 110 degrees of flexion and 40 degrees of adduction while lying on your living room rug. Instead, use practical proxies. Draw your knee up past 90 degrees toward your chest so your thigh passes a vertical line. Pull the knee across your body toward your opposite shoulder before rotating it. Breathe slowly out into the position. Do not bounce. The cross-body pull serves as your adduction component.
How strong this evidence is
You should understand the limits of these findings. The optimal-angle findings come from 21 healthy young men in the elastography study and 17 embalmed cadaver hips in the string-displacement study. Neither of these studies tested whether these exact positions relieve pain in people who have symptoms. What they support is a purely mechanical claim about muscle length, not a clinical promise of pain relief.
What a targeted stretch cannot do
Stretching is a mechanical tool. It pulls on tissue. It cannot diagnose the root cause of your pain, and it won’t fix a problem if the source is located somewhere else entirely. This is general information rather than medical advice. Treat it as such.
Tightness is not always the reason it hurts
Piriformis syndrome is a diagnosis of exclusion. A doctor only lands on it after ruling out more serious problems. It is thought to account for roughly 0.3 to 6 percent of all low back pain and sciatica cases. Estimates vary that widely because the diagnosis has no confirmatory test. It is also reported about six times more often in women than in men.
Because a herniated disc, spinal stenosis, facet arthropathy, and lumbar muscle strain can produce very similar pain profiles, stretching a buttock won’t help if the source is the lumbar spine. Imaging is typically used to exclude these spinal conditions rather than to confirm piriformis syndrome itself. If your spine is the true source of the irritation, gentle lower back stretches are a much more sensible place to start.
Addressing prolonged sitting habits
If you sit at a desk for nine hours a day, your hips adapt to that posture. Prolonged sitting is the usual aggravator for this region.
While a six-minute routine twice a day helps manage the symptoms, it works best when you also take regular breaks from prolonged sitting. Stretching offers a way to manage the daily tension, but addressing your desk posture prevents the area from locking up again. Sitting also shortens the front of the hip. Targeted hip flexor stretches often come into play to balance the joint over the long term.
Red flags: when to stop stretching and get checked
Never try to stretch your way through nerve damage. Pain that radiates down the leg can occasionally signal a severe medical emergency. Knowing the difference between a tight muscle and a symptom the NHS says needs same-day care is critical.
Symptoms that need same-day medical care
The NHS provides clear guidelines on when sciatica-type pain requires immediate intervention. Stop stretching and get urgent same-day medical help if you experience sciatica-type pain on both sides of your body. You also need immediate help for severe or worsening weakness or numbness in both legs. Numbness around or under the genitals, or around the anus, requires emergency care. New trouble passing urine or a loss of bladder or bowel control are severe red flags.
The NHS sciatica guidelines state these could be symptoms of a serious back problem needing hospital treatment as soon as possible. Do not wait to see if stretching helps these specific symptoms.
Signs the pain is coming from your back
Distinguish between a muscle stretch and nerve tension. A stretch should feel like a broad, deep ache in the buttock, and if it sharpens or narrows into a line, back off. A sharp, burning, or electric sensation travelling down the leg is nerve tension.
If you feel an electric line of pain shooting below your knee when you pull your leg across your body, back off the range immediately instead of pushing through. If the pain travels below the knee consistently, the broader set of sciatica stretches is likely a better starting point than an isolated hip stretch.
How long to give it before booking an appointment
If your symptoms do not include any red flags, conservative home management is the standard starting point. Most people who start an exercise programme for piriformis syndrome become symptom-free within 1 to 3 weeks.
See a clinician if the pain hasn’t improved after a few weeks of home treatment. Book an appointment if the pain is progressively getting worse or if it stops you from doing your normal daily activities.
A sequence to try at home
Building a routine requires consistency. Twice a day is a reasonable frequency for a symptom-driven stretching program. Consistency over a period of weeks matters far more than intensity in any single session.
The progression list
Start with the gentlest variation and hold it steadily. Move through this sequence twice a day. Only use the deeper variations if the baseline stretches feel too shallow to reach the muscle.
| Movement | Hold Time | Rounds | Key Form Cue |
|---|---|---|---|
| Supine figure-4 | 30 seconds | 2 to 4 per side | Keep your tailbone heavy and pull slightly across your body. |
| Knee-to-opposite-shoulder (if baseline is too shallow) | 30 seconds | 2 to 4 per side | Pull the thigh past vertical before crossing. |
| Seated ankle-over-knee (desk alternative) | 30 seconds | 2 to 4 per side | Hinge forward with a completely straight spine. |
The four mistakes that make it feel like nothing
People abandon these stretches because they fail to feel the target muscle. Four specific form errors ruin the mechanics of the movement.
First, keeping the hip only at 90 degrees so the thigh never passes vertical prevents the piriformis from shifting into its adductor role. Second, letting the pelvis roll off the floor to fake depth removes the tension from the hip and dumps it into the lower back. Third, pulling forcefully on the knee joint instead of the shin bone stresses the knee without loading the hip. Fourth, holding your breath and yanking into pain triggers a protective reflex that stops the muscle from yielding. Ease into a broad ache.
Tracking progress over time
Measure your progress by how your hip feels during normal daily activities, not by how hard you can pull your knee to your chest. If you can sit at your desk longer without the deep ache returning, the routine is working. If this is your first time committing to a daily mobility habit, the beginner stretching guide covers the basic principles of breathing and tension control. Stay patient and respect the red flags. Prioritize the cross-body angle over brute force to get the most out of your time on the mat.
Frequently asked
- How long should I hold a piriformis stretch?
- Hold each position for 15 to 30 seconds to get the most benefit. Most of the change in range of motion happens within this window. Repeating the movement two to four times per side is entirely sufficient.
- How often should I do piriformis stretches?
- Twice a day is a sensible frequency for managing symptoms. Consistency over several weeks matters far more than pushing hard in any single session.
- Why do piriformis stretches feel like they do nothing?
- You might be missing the adduction component. The muscle needs deep hip flexion combined with a cross-body pull to stretch fully. A shallow figure-4 position often falls short because the knee never crosses the midline.